It's been quiet on the home front here, but the end is drawing near (2 more weeks before the final presentation on 5/7, to be exact), and there is quite a lot to update.
This project has changed a lot since its conception, but many new ideas and potential future project concepts have sprung up along the way, and I am pretty pleased with how the project at hand is shaping up.
The original plan was to embed circuitry in felt itself... something I am still interested in exploring. I wanted to design felted audio signal processing circuits that would accept an analog signal in and output it back out after running through a series of filters.
I am near completing a similar project, only I decided to begin the research from a simpler place, working my way up the ladder of experimentation.
Having said that, felted signal processing has become a set of analog signal processing circuits consisting of a chorus effect, delay effect, tremolo effect, and finally, distortion effect. The processing circuits live on pcbs instead of within the felt itself, reassigning the felt's role from circuit board to soft potentiometer. The felt is directly integrated into the hardware, allowing the user to tranform various stages of the processing circuits as the audio signal passes through the mix of natural wool and steel wool.
For example, with the tremolo circuit, there are two felted objects. One controls the rate of the tremolo, while the other controls the depth. There are also two hardware pots available for setting the initial rate/depth. The felted pots offer expressive control over base settings that the user can dial in with the hard pots, for the purpose of introducing some constants to the system. The hardware pots can also be turned all the way down, leaving the signal processing to as much instability and momentary control as desired by the user. The goal is to set a fixed range over which the felt can distort the sound.
Each effect is daisy chained to itself and may be turned on or off within the chain by a switch. However, after I have all the effects and felted controllers finished, I plan on building a 3x3 resistor mixing matrix, that will provide multiple opportunities for feedback, amplification, and attenuation of the signal. Instead of each effect simply being daisy-chained to one another, they will be tied to various nodes in a 9-celled square, each node have 2 or 4 possible routes it can travel down. It opens the the doors up to all kinds of silliness, for sure.
Showing posts with label fiber. Show all posts
Showing posts with label fiber. Show all posts
Wednesday, April 23, 2008
Friday, April 04, 2008
feltedsignalprocessing.com
I just created a new space for the home of my felted audio filters. It's in development as you read, but for now I have a little page with a little description holding down the fort:
http://www.feltedsignalprocessing.com (in a new window)
http://www.feltedsignalprocessing.com (in a new window)
Monday, December 03, 2007
Loom: Update 7
This week I made a lot of progress with the loom, which is good since the show is only 2 weeks away, and dress rehearsal less than 1 week away.
I got it all set up on the ITP floor, got my sensors hooked up, and am spending this next week composing and figuring out my performance.
I was experiencing a drawback with getting the wireless accelerometer data into max/msp, but finally ironed that out a minute ago; the WiTilt 2.5 from SparkFun is a great little device, but there are some pitfalls to watch out for, which caused me many hours of frustration. Here are some tips:
- after you connect to the WiTilt over its serial port, make sure you hit the onboard reset button twice. Only after doing this was I able to get into the config screen from zterm (or terminal) in order to set the device up.
- when you configure the WiTilt, make sure the data is being sent out as 'raw data'. This will send everything out as ascii.
- once you are in max and connected to the WiTilt's serial port, don't forget that you won't be seeing the config screen (unless you are printing the incoming data after sending it through the atoi object), so just trust that after you hit the reset button twice and start getting a string of characters (which should be the config menu converted to dec values), you need to send a '1' character (49) in order to get the data stream started.
- conversely, send a spacebar character (32) to stop the data stream
- the best way to parse out the values you want from the data stream (which will be coming at you in ascii as something like X=392 Y=772 Z=857), is to use regular expressions. I configured my WiTilt to only send me values along the Y-axis, so i was getting a continuous stream of Y=553 (or whatever current reading was). I pulled that data in from the serial port into max, converted the ascii to an integer (atoi), and then used the following regular expression with the max regexp object to get the sensor value: ([\\d+]*)
That regex will take all the numbers out of the incoming serial packet and append them one after another, thus giving you a complete sensor reading (instead of giving you the reading as individual numbers. i.e. 583 coming to you as 5, 8, 3).
The thing that screwed me up the most in the beginning was forgetting to hit the reset button on the WiTilt. I'd sit there insanely frustrated, wondering why the config menu wasn't coming up. Unless I missed it after reading the datasheet a million times (which is still possible I guess), it's not noted by SparkFun that you have to do this. So when in doubt, hit the reset button!
Okay, so the other problem was my stretch sensor wasn't giving me values. That was just a result of a bad connection on the breadboard.
Other things that I have to do is size the yarn. Because it's wool, it's sticking to itself, so to speak. Wool fibers are composed of gazillions of tiny barbs that hook onto each other (which is why felting exists), and to get around this, you need to 'size' your wool, or soak it in water and elmer's glue, basically. One of my upright beams warped and cracked as well, so that was unfortunate.
So for next week, the plan is:
- build a stand for the loom (so it doesn't have to lean up against the wall)
- size my yarn
- compose
- implement xbee circuits so i can transmit sensor values wirelessly (although this will probably not be the version I use in the show, just in case something screwy happens last minute. Wires are much reliable)
Tuesday, November 20, 2007
Loom: Update 3-5
Okay, a lot has happened since my last update, but much progress was made. Here's what I've finished over the last three weeks:
- The loom is completely built!
- I decided to white wash it... at first i thought about staining it a dark walnut color, but went the other direction entirely and chose to make it all white.
- I finished making the weights which will be used for maintaining tension in the warp threads. They are 11oz soda cans slipped into black + gold woven fabric pouches I had sewn up over the weekend. 2 yards of fabric yielded about 28 pouches that will fit a soda can snuggly, with 3-4" of extra fabric past the length of the soda can for tying to the warp threads. Even though I got about 28 pouches out of my fabric, I'm only using 24 weights.
- Today I finished making the warp (the vertical threads that hang down from the top beam).
This next week will consist of me setting up my loom in its full glory, and testing it out. There are still a few other tasks to take care of though. Specifically:
- Get a large enough drill bit so i can set the top beam's supports in place better with nuts.
- Sew the warp to the top beam.
- Attach the weights.
- Tie the back threads to the heddle (the bar that I'll be pulling to bring the back threads over the front threads)
- Attach the sensors to the heddle and 5 of the weights.
- Attach the wireless accelerometer to my shuttle. I finally got it in the mail today.
- And practice!
The last few weeks had some pretty frustrating moments. Making the warp was insanely difficult to manage alone. Typically it takes a couple people to get it done, but it was hard to find someone who had time to help me out. I did eventually get it done on my own, after working on it for about 10 hours.
Also, I had to switch materials for use in the warp (the vertical, hanging threads). I was using wool for felting before but switched to a chunky alpaca yarn, as the felt wasn't strong enough to hold the weights; it kept tearing.
I have realised that wood that has been pre-treated for staining and then stained, tends to splinter when you try to drill into it. I should have done all my drilling before painting it. Fortunately, this splintering only happened on my uprights while attaching the supports for the top beam, so it won't be too visible.
The project is coming along really well though; I can see the light at the end of the tunnel. From Thanksgiving on out, I should be able to use any time I have for rehearsal and max patch tweaking.
Monday, October 22, 2007
Loom: Update 1
So I've broken the task of building this loom down into a few categories of attack:
Material (yarn)
Loom (building + augmentation of...)
Hardware (sensors, circuits)
Software (music mapping and programming)
Performance
This week I took on a few of the tasks under the Software header. I mapped out how I would use the loom for actual sound production and worked on some test patches in max/msp.
I also decided on what kinds of sounds I am going to produce. I'm going with deep synthy sounds, contrasted with fuzzy, crackly, scratchy sounds. Although it's nothing I'm completely intentionally doing, I'm well aware that many of the sounds I'm going with reference wool, hair, and other organic fibers.
As far as mapping goes, I'm tentatively going with this plan: I'd like the warp (vertical strands) to alter the sounds I've already laid on the canvas (which will be controlled by the weft, or the horizontal strands). The shuttle will either operate as a beat keeper, or it will act as some kind of interrupt as it slides across the warp. Actually, it will become percussive by default, as it affects the warp threads. I'd also like to have panning mapped literally going from left to right across the loom.
This next week, I want to continue working on my patches. The max/msp part feels like the largest challenge so far, since it is the part I'm the least familiar with. I will also try to build out a 'test loom', which will just be warp and weft threads hand-laid out so I can try to mock up what I ultimately want to do with the final loom.
The biggest challenge is working with max/msp. I'm fairly new to this program, and it can seem like a beast, and therefore hard to get started with. I'm overwhelmed by what I can potentially do, and by deciding what I exactly need to do. For now, I'm just accepting midi-data in from a test circuit, and producing sounds with that data.
Wednesday, October 03, 2007
Weaving Sound
For NIME this year, I've decided to create a loom which triggers samples and other various sounds, via max/msp. The exact details are yet to be worked out, as this is the simply the first step taken out of many. After much rumination on how I could combine both fiber arts and sound however, I'm happy to of finally found a direction which feels 'right'.
Looms, of course, are the tools used in weaving. They range from simple, hand-held devices, to lap-sized instruments, to giant, room-filling machines. Typically, there is a warp (vertical strands) and a weft (horizontal strands), that are brought together, transforming wools (or other raw materials) into fabric.
Historically, weaving is an ancient, cross-cultural, (traditionally) organic craft, typically assigned to women and yielding items of both expressive and utilitarian purpose.
I find something attractive in pairing both a usually soft, natural, feminine process with an assumed masculine, electronic process, comprised of components not normally thought of as 'soft' (i.e., wires, sensors, chips).
Juxtaposition aside, I feel there is a connection between weaving and musical composition. Actually, whether or not it actually ends up 'musical' is secondary. Transducing the motion of weaving into sound waves feels natural, almost literal – weaving together notes, samples, and aural textures into compositions of patterns and discrete designs.
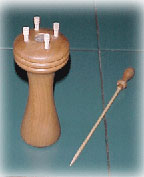
Here are some of the different kinds of looms I'm looking at:
Frame Loom
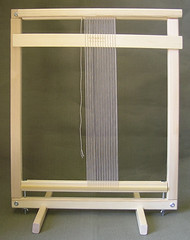
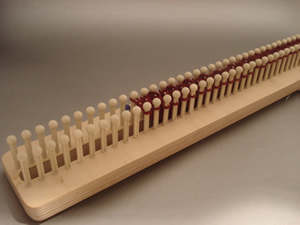
Peg Loom
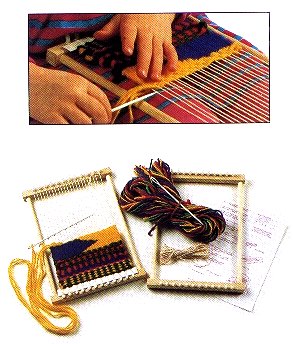
Heddle Loom
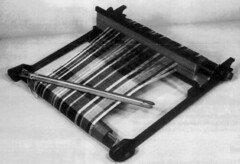
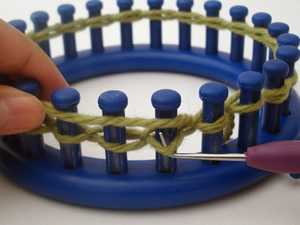
Knit Looms
Looms, of course, are the tools used in weaving. They range from simple, hand-held devices, to lap-sized instruments, to giant, room-filling machines. Typically, there is a warp (vertical strands) and a weft (horizontal strands), that are brought together, transforming wools (or other raw materials) into fabric.
Historically, weaving is an ancient, cross-cultural, (traditionally) organic craft, typically assigned to women and yielding items of both expressive and utilitarian purpose.
I find something attractive in pairing both a usually soft, natural, feminine process with an assumed masculine, electronic process, comprised of components not normally thought of as 'soft' (i.e., wires, sensors, chips).
Juxtaposition aside, I feel there is a connection between weaving and musical composition. Actually, whether or not it actually ends up 'musical' is secondary. Transducing the motion of weaving into sound waves feels natural, almost literal – weaving together notes, samples, and aural textures into compositions of patterns and discrete designs.
Here are some of the different kinds of looms I'm looking at:
Frame Loom
Peg Loom
Heddle Loom
Knit Looms
Subscribe to:
Posts (Atom)