It's been quiet on the home front here, but the end is drawing near (2 more weeks before the final presentation on 5/7, to be exact), and there is quite a lot to update.
This project has changed a lot since its conception, but many new ideas and potential future project concepts have sprung up along the way, and I am pretty pleased with how the project at hand is shaping up.
The original plan was to embed circuitry in felt itself... something I am still interested in exploring. I wanted to design felted audio signal processing circuits that would accept an analog signal in and output it back out after running through a series of filters.
I am near completing a similar project, only I decided to begin the research from a simpler place, working my way up the ladder of experimentation.
Having said that, felted signal processing has become a set of analog signal processing circuits consisting of a chorus effect, delay effect, tremolo effect, and finally, distortion effect. The processing circuits live on pcbs instead of within the felt itself, reassigning the felt's role from circuit board to soft potentiometer. The felt is directly integrated into the hardware, allowing the user to tranform various stages of the processing circuits as the audio signal passes through the mix of natural wool and steel wool.
For example, with the tremolo circuit, there are two felted objects. One controls the rate of the tremolo, while the other controls the depth. There are also two hardware pots available for setting the initial rate/depth. The felted pots offer expressive control over base settings that the user can dial in with the hard pots, for the purpose of introducing some constants to the system. The hardware pots can also be turned all the way down, leaving the signal processing to as much instability and momentary control as desired by the user. The goal is to set a fixed range over which the felt can distort the sound.
Each effect is daisy chained to itself and may be turned on or off within the chain by a switch. However, after I have all the effects and felted controllers finished, I plan on building a 3x3 resistor mixing matrix, that will provide multiple opportunities for feedback, amplification, and attenuation of the signal. Instead of each effect simply being daisy-chained to one another, they will be tied to various nodes in a 9-celled square, each node have 2 or 4 possible routes it can travel down. It opens the the doors up to all kinds of silliness, for sure.
Showing posts with label physical computing. Show all posts
Showing posts with label physical computing. Show all posts
Wednesday, April 23, 2008
Monday, December 03, 2007
Loom: Update 7
This week I made a lot of progress with the loom, which is good since the show is only 2 weeks away, and dress rehearsal less than 1 week away.
I got it all set up on the ITP floor, got my sensors hooked up, and am spending this next week composing and figuring out my performance.
I was experiencing a drawback with getting the wireless accelerometer data into max/msp, but finally ironed that out a minute ago; the WiTilt 2.5 from SparkFun is a great little device, but there are some pitfalls to watch out for, which caused me many hours of frustration. Here are some tips:
- after you connect to the WiTilt over its serial port, make sure you hit the onboard reset button twice. Only after doing this was I able to get into the config screen from zterm (or terminal) in order to set the device up.
- when you configure the WiTilt, make sure the data is being sent out as 'raw data'. This will send everything out as ascii.
- once you are in max and connected to the WiTilt's serial port, don't forget that you won't be seeing the config screen (unless you are printing the incoming data after sending it through the atoi object), so just trust that after you hit the reset button twice and start getting a string of characters (which should be the config menu converted to dec values), you need to send a '1' character (49) in order to get the data stream started.
- conversely, send a spacebar character (32) to stop the data stream
- the best way to parse out the values you want from the data stream (which will be coming at you in ascii as something like X=392 Y=772 Z=857), is to use regular expressions. I configured my WiTilt to only send me values along the Y-axis, so i was getting a continuous stream of Y=553 (or whatever current reading was). I pulled that data in from the serial port into max, converted the ascii to an integer (atoi), and then used the following regular expression with the max regexp object to get the sensor value: ([\\d+]*)
That regex will take all the numbers out of the incoming serial packet and append them one after another, thus giving you a complete sensor reading (instead of giving you the reading as individual numbers. i.e. 583 coming to you as 5, 8, 3).
The thing that screwed me up the most in the beginning was forgetting to hit the reset button on the WiTilt. I'd sit there insanely frustrated, wondering why the config menu wasn't coming up. Unless I missed it after reading the datasheet a million times (which is still possible I guess), it's not noted by SparkFun that you have to do this. So when in doubt, hit the reset button!
Okay, so the other problem was my stretch sensor wasn't giving me values. That was just a result of a bad connection on the breadboard.
Other things that I have to do is size the yarn. Because it's wool, it's sticking to itself, so to speak. Wool fibers are composed of gazillions of tiny barbs that hook onto each other (which is why felting exists), and to get around this, you need to 'size' your wool, or soak it in water and elmer's glue, basically. One of my upright beams warped and cracked as well, so that was unfortunate.
So for next week, the plan is:
- build a stand for the loom (so it doesn't have to lean up against the wall)
- size my yarn
- compose
- implement xbee circuits so i can transmit sensor values wirelessly (although this will probably not be the version I use in the show, just in case something screwy happens last minute. Wires are much reliable)
Tuesday, November 27, 2007
Loom: Update 6
Okay, I'm still waiting for a space to set my loom up in. And my cat got sick on my laptop, thereby killing it (it's not salvageable apparently) and cutting my access to my max/msp and arduino files thusfar developed. Not a great week.
But I did make some progress, despite that. I re-did my warp, as it wasn't long enough the first time I made it, and it went A LOT faster the second time around (about 2 hours vs, uh, 10 hours last time). So that is now finally complete and attached to my top beam. Other things completed:
- Got the correct bolts in my top beam supports. It's all bolted up to the uprights and ready to go.
_ Got my shed stick cut and bolted to the bottom of the loom (for separating the front and back threads from each other)
- Put together xbee/accelerometer circuits to go on five of the 24 weights hanging from the warp
- Got my shuttle put together with the wireless accelerometer sensor + a lithium battery
- Rewrote my max patch to where it was before
Oh yes, the xbee is an addition, heh. I am combining this final with my Mesh Networking final, and making the weights wireless devices that send their values remotely. I will be keeping a wired version of the code and board handy though, in case some kind of wireless mishap takes place, which seems to always be a danger, and I don't want any of that at showtime.
This next week is just wrapping everything up I guess and well, getting the xbee stuff all working flawlessly as well as tweaking the sound still.
Tuesday, November 20, 2007
Loom: Update 3-5
Okay, a lot has happened since my last update, but much progress was made. Here's what I've finished over the last three weeks:
- The loom is completely built!
- I decided to white wash it... at first i thought about staining it a dark walnut color, but went the other direction entirely and chose to make it all white.
- I finished making the weights which will be used for maintaining tension in the warp threads. They are 11oz soda cans slipped into black + gold woven fabric pouches I had sewn up over the weekend. 2 yards of fabric yielded about 28 pouches that will fit a soda can snuggly, with 3-4" of extra fabric past the length of the soda can for tying to the warp threads. Even though I got about 28 pouches out of my fabric, I'm only using 24 weights.
- Today I finished making the warp (the vertical threads that hang down from the top beam).
This next week will consist of me setting up my loom in its full glory, and testing it out. There are still a few other tasks to take care of though. Specifically:
- Get a large enough drill bit so i can set the top beam's supports in place better with nuts.
- Sew the warp to the top beam.
- Attach the weights.
- Tie the back threads to the heddle (the bar that I'll be pulling to bring the back threads over the front threads)
- Attach the sensors to the heddle and 5 of the weights.
- Attach the wireless accelerometer to my shuttle. I finally got it in the mail today.
- And practice!
The last few weeks had some pretty frustrating moments. Making the warp was insanely difficult to manage alone. Typically it takes a couple people to get it done, but it was hard to find someone who had time to help me out. I did eventually get it done on my own, after working on it for about 10 hours.
Also, I had to switch materials for use in the warp (the vertical, hanging threads). I was using wool for felting before but switched to a chunky alpaca yarn, as the felt wasn't strong enough to hold the weights; it kept tearing.
I have realised that wood that has been pre-treated for staining and then stained, tends to splinter when you try to drill into it. I should have done all my drilling before painting it. Fortunately, this splintering only happened on my uprights while attaching the supports for the top beam, so it won't be too visible.
The project is coming along really well though; I can see the light at the end of the tunnel. From Thanksgiving on out, I should be able to use any time I have for rehearsal and max patch tweaking.
Tuesday, October 23, 2007
Kick Me: Finished!
We got our xbee/fsr controlled kick game for Mesh Networking working today!
The icons come out on a broadcasted beat, which our xbee picks up, and then are 'kicked' to one of four environments, depending on which force sensor pad the player stomps on.
So okay, we aren't actually 'kicking' anymore; it's now 'Stomp Me'. Or alternately Kick (Stomp) - A - Mole (Icon).
Anyways, here's a screen cap:

And the Processing source code:
SRC
Tuesday, October 16, 2007
xbee game (as yet unnamed)
My group and I decided to make a little foot-eye coordination game, coordinated to a xbee broadcasted beat. The parts to our project are as such:
- a physical interface consisting of a kick pad with FSRs in them, for recording which pad was kicked and how hard.
- the hardware involving an xbee and arduino, for capturing the broadcast beats and fsr readings
- the software, processing, for displaying our environment, which will be updated per the data sent over from our arduino.
Basically, our processing environment consists of four areas: a forest, a city, a desert, and a river. The screen will be divided into four equal parts for each eco-system. Moving along the bottom of the screen (coordinated to every 2nd broadcast beat) will be a conveyor belt, carrying with it three different kinds of icons: an egg, a baby, or a seed:
These icons will drop onto the conveyor belt in coordination with the broadcasted beat. Depending on which FSR pad you kick, you can send each of these icons out into one of the four environments. How hard you kick the pad will determine how far out 'into' the screen the icon travels. Finally, depending on which icon you kicked and which environment it landed in, the egg/seed/baby will grow into a specific animal/plant/character. For example, if you kick the baby into the city/desert/forest/river, you will get:
So far, we have designed our icons and have the core architecture of the processing program in place. We also have been able to pick up the broadcasted beat and are working on putting together a kick pad.
We have divided up the labor as such:
Shin-yi + Sarah: Graphics/Animation/Processing programming
Daniel + Shilya: Kick pads and hardware programming
- a physical interface consisting of a kick pad with FSRs in them, for recording which pad was kicked and how hard.
- the hardware involving an xbee and arduino, for capturing the broadcast beats and fsr readings
- the software, processing, for displaying our environment, which will be updated per the data sent over from our arduino.
Basically, our processing environment consists of four areas: a forest, a city, a desert, and a river. The screen will be divided into four equal parts for each eco-system. Moving along the bottom of the screen (coordinated to every 2nd broadcast beat) will be a conveyor belt, carrying with it three different kinds of icons: an egg, a baby, or a seed:
 |  |  |
These icons will drop onto the conveyor belt in coordination with the broadcasted beat. Depending on which FSR pad you kick, you can send each of these icons out into one of the four environments. How hard you kick the pad will determine how far out 'into' the screen the icon travels. Finally, depending on which icon you kicked and which environment it landed in, the egg/seed/baby will grow into a specific animal/plant/character. For example, if you kick the baby into the city/desert/forest/river, you will get:
 |  |  |  |
So far, we have designed our icons and have the core architecture of the processing program in place. We also have been able to pick up the broadcasted beat and are working on putting together a kick pad.
We have divided up the labor as such:
Shin-yi + Sarah: Graphics/Animation/Processing programming
Daniel + Shilya: Kick pads and hardware programming
Sunday, October 07, 2007
ROCK/PAPER/SCISSORS
My partner and I each built a device with an arduino and xbee radios that can wirelessly play rock/paper/scissors with the other. We got it 100% working now, but until today, there were two strange bugs causing me (the programmer) a major headache.
ARDUINO SRC
The Problems :(
The first bug was how the win/loss/tie was being tallied; only one of us ever got the results back from our match (had one of our win/loss/tie LEDs switch on), and it was always opposite of what it should have been. For example, if I rolled first, and chose rock, and then she rolled and chose scissors, her 'win' light would turn on (even though she should have lost), and I would have no outcome LED turn on at all.
The second bug (which turned out to be the reason for why one of us wouldn't have an outcome LED light up) was causing the character 'A' to be sent out the serial port, after each round played. Whenever we started a new round, the program would run through the whole switch statement, and then for one us, begin to start a new round up again, without having triggered the program to do so. This also caused one of us to not have an outcome LED turn on, because I programmed the game to turn off all LEDs on the board (to reset the board, essentially) at the start of each new round.
The Answers! :)
The first bug was due to my dyslexic coding. After I make a choice and send it to my opponent, and receive my opponent's choice, i run the data through a function that compares the two choices and switches on the appropriate outcome LED (win/tie/loss). Well, the issue turned out to be that I was comparing the opponent's choice as though it was *mine* and my choice as though it was my *opponent's*. Thus, we were getting the results backwards and the wrong outcomes. Once I fixed this, we were getting the right outcome LEDs to turn on.
The second bug was due to us not having put any delays in our main switch statement. After adding a 1 second delay before setting the game back into 'gameOver' mode (in the last case statement), we finally weren't getting any extra characters sent out the serial port (which was screwing up the whole game flow). Basically, I have a function in the main loop that is constantly checking the status of the play button. If the play button is high (is depressed) *and* the game's current status is 'gameOver', it sets the game's status to 'start', sends an 'A' out the serial port (to start the handshake with the other device), and randomly picks a number corresponding to rock/paper/scissors while waiting for the other guy to start their game too. Essentially, it starts a new round of rock/paper/scissors. Well, what was happening was that the program was playing and processing one round faster than we could finish pushing the button. Which is pretty damn fast. So adding a 1 second delay in there gave our lowly human hands enough time to stop pushing the button before the game was over.
Other than those issues, we only had one other pitfall, which I'm sure plagues 90% of people working with xbees. At least when you first start working with them, and have been up coding for 12 hours straight: We assigned the same id's to each radio. We figured that problem out early on, but it's still worth mentioning. Make sure your radios actually have someone else to talk to. Talking to yourself doesn't get you too far in the world of wireless communication.
Monday, October 01, 2007
Quick pcomp sketch
So I was asked to make a little device that addresses a problem on the ITP floor. Well, 'problem' is a very subjective term, and it turned out that my 'problem' with the ITP floor wasn't as much of one for anyone else, thereby pointing out that I might be a little OCD. oh well.
The problem I chose to tackle was the one of the pcomp lab's tool box drawers not always being fully shut (photo coming soon). It's not a *huge* problem to me, but an issue nonetheless, however petty it might be. And anyways, it's the one I chose to solve, so here you go:
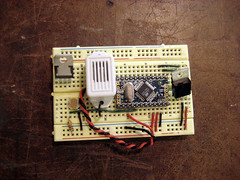
doorbell
Originally uploaded by 0x000000
This device is just a photocell + a doorbell buzzer. When the arduino reads a value off the photocell of less than 200 for more than 10 seconds (ideally, this would be set to a couple minutes, so people have time to open the drawer and shuffle about for their item), a very loud, obnoxious, annoying buzz goes off, until the drawer is fully shut again.
arduino src
The problem I chose to tackle was the one of the pcomp lab's tool box drawers not always being fully shut (photo coming soon). It's not a *huge* problem to me, but an issue nonetheless, however petty it might be. And anyways, it's the one I chose to solve, so here you go:
doorbell
Originally uploaded by 0x000000
This device is just a photocell + a doorbell buzzer. When the arduino reads a value off the photocell of less than 200 for more than 10 seconds (ideally, this would be set to a couple minutes, so people have time to open the drawer and shuffle about for their item), a very loud, obnoxious, annoying buzz goes off, until the drawer is fully shut again.
arduino src
Thursday, April 05, 2007
Wearables + Networked Objects final
I'm documenting my project for wearables + netobjs here:
Joan Dress
It's code named Joan for now, for Joan of Arc, who had divine visions from above (i.e., the 'net, naturally!)
Basically, it's a dress augmented with conductive threads and thermochromic inks. The threads cause the inks to change color via resistance heating, and in response to network activity.
Subscribe to:
Posts (Atom)