Well, we finished it finally. It ain't the prettiest thing in the world, but hey! It's just a prototype afterall. The functionality works perfectly!
Documentation is posted at http://www.chootka.com/itp/pcomp/intro/catFeeder/.
Saturday, October 28, 2006
Friday, October 27, 2006
lab: week 7, dc motor control
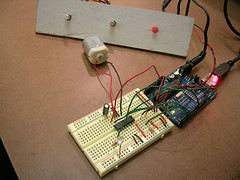
breadboard/arduino setup, wired to a dc motor and push button. This is just a simple lab that demonstrates how to wire up a dc motor, and control it's direction by reversing the current going through it. The current is controlled by the red push button: When it is down, it spins clockwise, when it is up, counter clockwise.
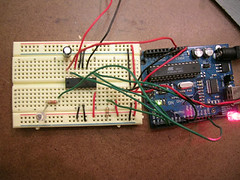
Close-up of the breadboard/arduino.
wire jungle!!!
Close-up of the breadboard/arduino.
wire jungle!!!
Sunday, October 22, 2006
Cat Feeder update!
First, a summary:
Our feeder is set to consist of a mat, which has a force sensor in it, in order to determine which cat is on the mat by weight. We plan on setting up some sort of calibration mode, so that the owner can assign a bowl to each cat in his/her home. Our feeder will also have a timer built into it, so the user can put a serving of wet food in the bowl before leaving for the day, and have the food made available to the cat at the time of day set on the timer. Finally, there will also be an 'open lid' button, an LED indicating power, an LED indicating when the bowl is empty, and an LED indicating when the system is active.
We discussed various ways to deal with the moving lid. We talked about having a lid that rotated 180 degrees to reveal the food underneath, pushing the bowl out from a slot, and simply raising and lower the lid from an armature, all done with a servo. We went with the last option.
Now, the update:
For our timer, we were going to use a variable resistor, that let you set time based on where a slider was positioned along a strip marked with hour intervals. We realised, however, that this was going to be problematic, in the event that the feeder lost power. The clock would be reset, and the timer would no longer be meaningful. i.e. if the clock was set to 5pm, and the user sets the timer to feed the cat at 8pm, but the power goes out, by the time it comes back on, the clock will be reset to some arbitrary time.. therefore rendering our original 8pm feeding time to mean some other hour.
So, to get around this, we decided to go with a digital alarm clock picked up from kmart. The advantage to this is ease of setting the clock and the alarm via a pre-made interface. Plus providing a digital display. The interface is much better than one that we would be able to build in the time we have. Once the alarm goes off, we set the arduino to leave the system activated for one hour following. After the hour elapses, the system deactivates, and the cat can no longer eat.
To determine when the bowl is empty, we are using a limit switch, which clicks on when there is no food left in the bowl. Basically, our bowl sits in a ring, which has an arm that extends into the system, and has a counterweight at the end of it. When the bowl is empty, the counterweight pulls the bowl up, disengaging our switch. When it is full, the bowl outweighs the counterweight, and pulls down in the other direction, tripping the switch. We still need to find a suitable counterweight, so that it balances out with the typical amount of cat food we will be putting into the bowl.
Our next step is to build the mat with the fsrs in place, and to build a housing to contain the guts of our system, and to hold our interface in place. And to find a good counterweight for checking the bowl's food level. stay tuned.
Monday, October 16, 2006
lab: week 5, Serial communication: Serial Poetry
I made a little prototype, involving a photocell sensor and a 255-word crappy poem. The idea is, as you restrict and allow different levels of light into the photocell, a new word of the poem will be printed on screen. The theme being light and darkness. Clever huh!
I got it working finally, though the problem wasn't as big as i thought. It was just a stale lockfile that was preventing my serial port from working correctly. Anyways, it works as expected, except that these photocells don't seem very sensitive. So it's been almost impossible to get to the upper and lower regions of the poem.
Here's a little screen cap:

first_prototype
First prototype of an automatic cat feeder my group is building. This is an automatic *wet cat food* feeder, no less. We hacked about an alarm clock to use as a timer, so you can set for when the feeder lid will be open, in case you aren't home in time to feed your cats yourself.
midterm: Datafall (nee Network Clouds)
Data visualization is something i've been interested in for a little while now. I first became aware of the technique of making normally invisible data visible, in my step-dad's lab. He would run ELISA tests (Enzyme-Linked Immunosorbent Assay) and gel stains on lab results from his experiments. What he was checking for in particular, i'm not 100% sure on, but it doesn't really matter either. I just remember being really impressed with the action of transmuting one kind of information into another (visual) kind.
Thus, here I am, on the computer, and on a network, for 90% of my day, and naturally I find myself interested in what kinds of activity takes place over, ahem, "Information Super-Highways" (yes, i said it). Aside from natural curiousity, this was also inspired, in part, by a piece of software that my friend John made. It is an application which translates network activity into sound. It is written in java and can be downloaded here.
I originally had called my project Network Clouds, because i envisioned making just that.. rain clouds, if you will, each of which represent a port that has activity happening on it. The properties of the raining particles would relate to certain characteristics of the information moving through the port (number of bytes transmitted, frequency of transmission, length of transmission, http response code, ip address the request was coming from, etc).
For the purpose of this particular demo, I went and grabbed some ftp info from The Internet Traffic Archive. This is a pretty neat place on the intarweb where one can find, uh, archived sets of network data.
The waterfall I made relates to the data in the following way:
- The width of each particle stream is determined by the length of transmission time per packet.
- The grey-scale shade is determined by the frequency of packet transmission. (Were there requests every 2 seconds, every 1 second, 6 seconds, etc)
That's it for now, actually, but I am planning on tweaking it more. I'm new to particle systems, so I still have a tendency to break things when fiddling with them. Ideally, it would work like this:
- Width of particle stream is determined by the number of bytes sent per transmission
- Color or shade is determined by the total number of requests made for the packet
- Acceleration of particles is set by the frequency of packet transmission
- Lifespan of particles are determined by the length of transmission time
Current visualization of this project can be seen here.
Friday, October 06, 2006
lab: week 4, servo motor control
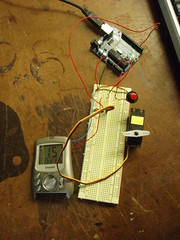
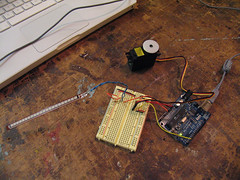
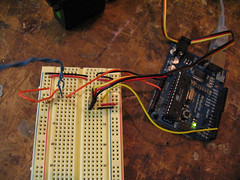
I hooked up a servo motor to receive analog input from a flex sensor, via an arduino board. The angle in which the flex sensor is bent, will control the servo's movement, over an 180 degree spectrum.
close up:
close up:
Subscribe to:
Comments (Atom)
